The Art and Science of Car Body Repair: A Comprehensive Guide to the Car Body Repair Bench
Apr 14, 2025
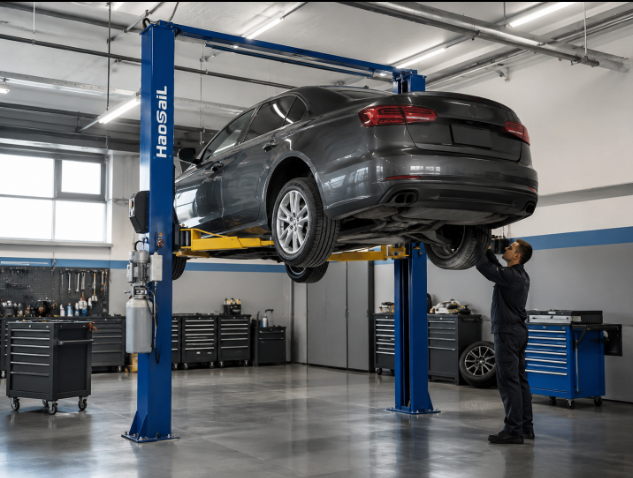
In the world of automotive repair, the Car Body Repair Bench is a crucial tool that helps technicians restore damaged vehicles to their original condition. Whether it's a minor dent or a major collision, this versatile piece of equipment plays a vital role in the repair process. Understanding the principles behind its operation, the necessary precautions, and the correct procedures can significantly enhance the efficiency and accuracy of repairs. Let's explore the intricacies of the Car Body Repair Bench and how it can be used effectively.
The Working Principle of the Car Body Repair Bench
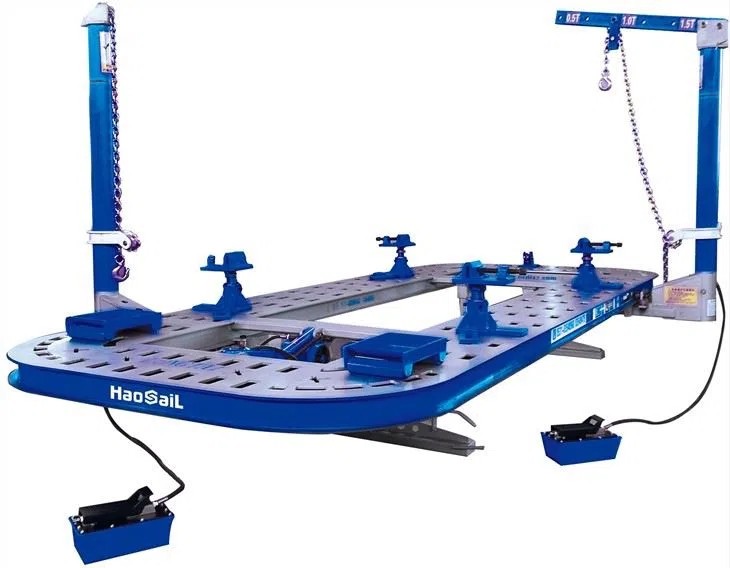
The Car Body Repair Bench is designed to provide a stable and secure platform for repairing and aligning car bodies. It operates on the principle of controlled force application and precise measurement. The bench typically consists of a sturdy frame, adjustable clamps, and a series of hydraulic or pneumatic systems that allow technicians to apply and control tension and pressure.
When a vehicle is damaged, the frame or body panels may become misaligned or deformed. The Car Body Repair Bench uses a combination of pulling and pushing forces to realign these components. Technicians attach specialized clamps and chains to the damaged parts and connect them to the bench's hydraulic or pneumatic system. By carefully controlling the amount of force applied, they can gradually pull or push the parts back into their original positions.
The bench also incorporates a range of measurement tools, such as laser alignment systems and digital gauges, to ensure precise adjustments. These tools allow technicians to monitor the alignment process in real-time, ensuring that the repairs are accurate and consistent with the vehicle's original specifications.
Key Considerations for Safe Operation
Operating a Car Body Repair Bench requires a meticulous approach to safety. Here are some crucial points to keep in mind:
1. Personal Protective Equipment (PPE): Always wear safety goggles to protect your eyes from flying debris. Ear protection is also essential due to the high noise levels generated during the repair process. Additionally, gloves can protect your hands from accidental cuts and abrasions.
2. Vehicle Preparation: Before placing the vehicle on the Car Body Repair Bench, ensure that it is clean and free from any loose parts or debris. Remove any damaged panels or components that may interfere with the repair process. Secure the vehicle to the bench using the appropriate restraints to prevent any movement during the repair.
3. Equipment Inspection: Regularly inspect the Car Body Repair Bench for any signs of wear or damage. Check the hydraulic or pneumatic systems for leaks, and ensure that all clamps and chains are in good condition. A malfunctioning piece of equipment can lead to inaccurate repairs or even accidents.
4. Force Control: When applying tension or pressure to the damaged parts, always start with a low force and gradually increase it as needed. Applying excessive force too quickly can cause further damage to the vehicle or even break the clamps and chains.
5. Measurement Accuracy: Use the measurement tools provided with the Car Body Repair Bench to ensure precise alignment. Take multiple readings and double-check your measurements to avoid any errors. Accuracy is crucial for restoring the vehicle's structural integrity and appearance.
Operating the Car Body Repair Bench
Once you've taken all the necessary safety precautions, you can proceed with the repair process. Here's a step-by-step guide to operating your Car Body Repair Bench:
1. Vehicle Placement: Carefully position the vehicle on the Car Body Repair Bench. Use the built-in restraints to secure the vehicle firmly in place. Ensure that the vehicle is level and properly aligned with the bench's measurement systems.
2. Damage Assessment: Conduct a thorough inspection of the damaged areas. Identify the points where tension or pressure needs to be applied. Mark these points clearly to guide the repair process.
3. Clamp Attachment: Attach the clamps and chains to the damaged parts. Ensure that they are securely fastened and positioned correctly. Connect the clamps to the hydraulic or pneumatic system of the Car Body Repair Bench.
4. Force Application: Gradually apply tension or pressure to the damaged parts. Start with a low force and monitor the movement of the parts. Use the measurement tools to ensure that the alignment is accurate. Adjust the force as needed until the parts are properly aligned.
5. Monitoring and Adjustment: Continuously monitor the repair process. Check the alignment and make any necessary adjustments. If you encounter any resistance or unexpected movement, stop the process, re-evaluate the situation, and adjust your approach accordingly.
6. Final Inspection: Once the repairs are complete, conduct a final inspection to ensure that all parts are properly aligned and secured. Remove the clamps and chains, and carefully remove the vehicle from the Car Body Repair Bench.
Conclusion
The Car Body Repair Bench is an essential tool in the automotive repair industry, enabling technicians to restore damaged vehicles with precision and efficiency. By understanding its working principle, adhering to safety guidelines, and following proper operating procedures, you can achieve high-quality repairs that restore the vehicle's structural integrity and appearance. Whether you're a professional technician or a DIY enthusiast, mastering the use of the Car Body Repair Bench is a valuable skill that can significantly enhance your repair capabilities. So, gear up, take the necessary precautions, and let your expertise shine with the help of this powerful tool.